Capturing images of birds in flight is perhaps the most difficult task a camera (and photographer) can tackle. Even the most experienced wildlife professionals are always looking for a more robust AF system in their cameras to improve the “hit rate” of tack sharp shots they take in the field. No photographer wants to spend hours, days or weeks shooting graceful takeoffs and landings of birds in flight and return home to find their images soft, blurred and worthless to their clients. So whenever a camera manufacturer develops a brand new autofocus system for their mid-level cameras like Canon recently did with the EOS 7D, a lot of photographers will sit up and take notice.
Having a camera like Canon’s EOS 7D with a brand new AF system doesn’t guarantee sharp images however, unless you take the time to learn to use it properly. Unfortunately, learning the “ins & outs” of a camera’s AF system can be a difficult and time consuming process, even for the most seasoned of professionals. With that in mind, here’s a few things about the 7D’s new 19-point AF system that you should know before heading out to the field.

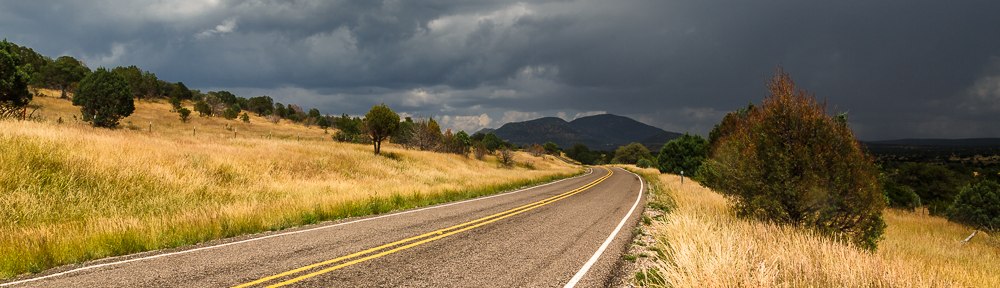
Flight Risk – Brazos Bend State Park, Texas
Copyright © 2011 Jeff Lynch Photography
Shot taken with a Canon EOS 7D set on aperture (Av) priority using an EF 400mm f/4 DO IS USM + EF 1.4x Extender mono-pod mounted. The exposure was taken at 560mm, f/6.3 for 1/250th of a second at ISO 200. Post capture processing was done in Adobe’s Lightroom 3.
Click on the image above for a larger version.
New AF Sensor
The EOS 7D has a brand new designed Autofocus sensor. Autofocus sensors work by detecting lines of contrast. They are normally sensitive to vertical lines or horizontal lines but not both. In the real world, these type of sensors (with only one type of line sensitivity) are not generally very effective and Canon has (finally) made all 19 sensors in the 7D “cross-type” so that they are sensitive to both horizontal and vertical lines. To go one step further, Canon has also made the center AF point use a diagonal, cross-type sensor for lenses with apertures of f/2.8 or larger. This is a HUGE advantage over the AF systems found in Canon’s other consumer (XXXD series), prosumer (XXD series) and professional (5D Mark II) cameras. Until recently, nothing like this new AF system existed outside the high-end “1D” series cameras.
Autofocus Point Selection
Here’s where things get a bit complicated so bear with me as I attempt to explain. The new EOS 7D’s Autofocus system is highly customizable just like those found in the 1D series cameras. Five different methods can be chosen to make use of the 19 AF points.
- Manual Selection: Single Point AF – Any of the 19 AF points can be selected when shooting in Program (P), Shutter Priority (Tv), Aperture Priority (Av) or Manual (M) modes.
- Manual Selection: Spot AF – Normally, the actual AF sensor for each AF point is larger than what is shown in the viewfinder. Spot AF uses a much smaller sensor “area” for situations where you want to be very precise in where you focus upon such as a birds eye.
- Manual Selection: AF Point Expansion – Focus is achieved with the selected single AF point with help from the surrounding AF points. This is very useful when tracking birds in flight.
- Manual selection: Zone AF – This mode works just like “Automatic Selection” but only the AF points in the selected zone are used to focus. There are five zones available (left, top, bottom, centre and right). This mode also makes it easier to track birds in flight, especially if they are off center in the scene.
- Auto Selection: 19 Point AF – This is the “standard” mode. When shooting in “One Shot” mode, the closest subject to the camera is used to focus. Once focus is locked, the AF point (or points) which were used to focus will turn red in the viewfinder. In “AI Servo” mode, the AF point that starts the focus tracking can be selected. On all previous Canon cameras, only the center point could be used as the primary AF point. By being able to select the AF point to start tracking, you have a much greater flexibility in how to compose your images.
AI Servo II Mode
The new Canon EOS 7D also includes a brand new “AI Servo” mode which boasts several significant improvements to the predictive tracking algorithm. It’s also possible to register a set of “AI Servo” settings that can be recalled using either the Depth of Field Preview button or the Lens AF Stop button. The EOS 7D includes a new “AF Wizard” which guides you through the four autofocus custom functions to register the AF Area Selection mode, the AI Servo Tracking Sensitivity, the AF Priority for 1st & 2nd Shots and the AF Tracking Method. The wizard makes it a bit easier to understand the various AF settings and gives you the option to set them in a logical order (or so they say).
First Impressions
I’ve been shooting birds with the EOS 7D for several months now and I’m very impressed with the accuracy and speed of the new Autofocus system. After shooting with many different Canon DSLR cameras, it’s nice to finally have a decent AF system in a camera costing less than $5000. The AF system in the new EOS 7D puts the AF system in my (much more expensive) 5D Mark II to shame. As you can see in the image above (shot 3 of 7 in a high-speed burst), tracking birds in flight is now almost second nature for this camera.
Exploring and testing all the Autofocus system settings is going to take some time however. Luckily, there are quite a few good articles posted on blogs around the globe pertaining to this subject. In fact, photographer Gary Luhm has posted an excellent tutorial with all his settings for capturing birds in flight. He’s also published a link to a Canon document covering the new 1D Mark IV’s AF settings which are very similar to the 7D’s settings. Both contain great detail about each setting selected and why each was chosen.
My Birds in Flight AF Settings
AI Servo Mode (Of Course)
Manual Selection: AF Point Expansion (Center Point + Surrounding Points)
C.Fn III-1 AI Servo Tracking Sensitivity – Set to 2 or 3 (Medium or Medium-Slow)
C.Fn III-2 AI Servo 1st/2nd Image Priority – Set to 0 (AF Priority / Tracking Priority)
C.Fn III-3 AI Servo AF Tracking Method – Set to 0 (Main Focus Point Priority)
C.Fn III-4 Lens Drive When AF Impossible – Set to 1 (Focus Search Off)
C.Fn III-5 AF Micro-Adjustment – Set to 2 (Adjust by Lens)
C.Fn III-6 Select AF Area Selection Mode – Set to Enable all Choices
C.Fn III-7 Manual AF Point Selection Pattern – Set to 1 (Continuous)
Some Final Thoughts
Getting comfortable with your camera’s custom settings can made a big difference in your bird photography. Don’t be afraid to experiment and try out new settings while in the field. Take notes in the field and keep track of what you change so that you can see what worked and what didn’t when you return home to review your shots. Learn as much as you can about your camera on the Internet. There are thousands of photographers across the globe using the same camera and lenses that you use. I think you’ll be surprised about just how easy it is to connect with others and learn from their experience.
Of course, you are always welcome to post a question comment or remark on any topic. If you’re “blog shy” just drop me an email via the “Contact Me” page here on this blog.

Hi!
I am in need of help! I keep getting focused on one person in a group picture. How do I select all AF points rather then a particular area? I use a external flash as well and sometimes it happens sometimes it doesnt! I need your assistance!!!
Thanks,
Jimmy Rogers
Jimmy,
You camera’s AF system will pick the best spot to focus in a group shot. All you need to do is make sure your aperture provides enough depth of field to get everyone in the shot in perfect focus. I generally shoot group portraits at f/8 or f/11 to make sure my DOF is sufficient.
Jeff
Thanks what would you suggest i set my af point on for shooting soccer ?
Thanks Mike.
Mike,
Thanks for reading. For sports I generally set the center point only and shoot in AI Focus mode.
Jeff
Pingback: Focusing on Birds - Page 8
Very informative post. Thank you! Really enjoying your 7D related posts recently.
Thanks
Thanks Vikram and happy new year!
Wonderful camera setting tips for BIF. I have incorporated those into my 7D camera settings and have already seen an increase in the number of good shots. I have attended photo seminars on BIF shooting from 2 professional photographers and they only focused on the mechanics and techniques of BIF and only slightly covering the custom settings. Your suggestions will become invaluable in my future BIF shootings.
I have a couple of suggestions to your recommendations:
1. Register Camera User Settings for BIF shots. For example C1 for BIF set up and C2 for terrestrial subjects. This makes it quick and convenient to switch back and forth.
2. I almost always use a tripod when shooting with my 500mm USM IS lens. The height is set to slightly higher than eye level when positioned horizontal to the horizon. This helps aiming and retaining focus for birds that fly above the horizon. Slight adjustments need to be made for BIF shots where the bird is flying directly along the line of sight.
3. I prefocus on distant object before attempting to focus on BIF. This allows for quick focus pickup.
Thanks again for the great BIF tips. Much appreciate it.
Bill,
Nice to hear from you again! With a lens over 400mm I also use a tripod with a Wimberley gimbal head. It’s just a bit much to lug around a lake during a hike, so these days I prefer the 400mm + 1.4x and my monopod setup. Thanks for the other tips as well.
Jeff
Pingback: Tweets that mention Canon EOS 7D AutoFocus Modes Explained | Serious Amateur Photography -- Topsy.com