You never know when a great photographic opportunity will present itself but sometimes lugging around a DSLR and lens is just not possible. That’s why most of us carry a point & shoot camera like the Canon Powershot G10/G11/G12 wherever we go. Like many photographers, I really love the resolution and detail my Canon 5D Mark II is capable of producing and for most of my professional and personal shooting it’s my camera of choice. However, like all other DSLRs the 5D2 can be quite a load to lug around when you’re already carrying too much other stuff.
 This past Sunday I participated in my first Cowboy Action Shooting (SASS) match with the Thunder River Renegades in Magnolia, Texas. I’d thought to bring along my complete camera bag but after loading my rifle, shotgun, pistols, ammunition, costume and gun cart, I thought better of it and grabbed my trusty G10 instead.
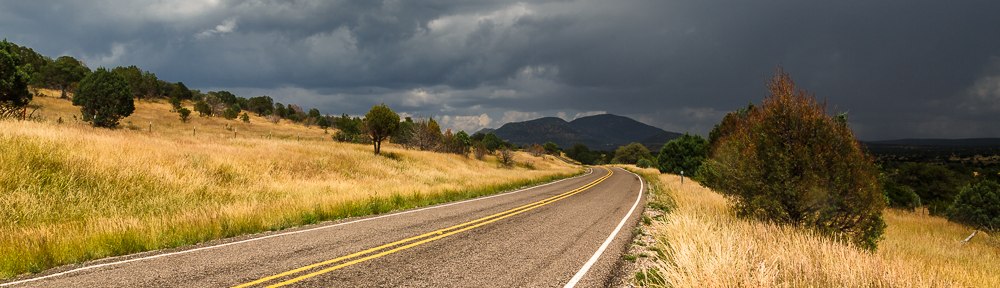
Sometimes all you really need is the convenience of a point & shoot combined with the control of a DSLR (without the weight of course). This is the niche that Canon’s Powershot “G” series were made for. And with the addition of a few inexpensive accessories as shown above, the G10/G11/G12 can perform perfectly on those occasions when less is more. In fact, I find myself taking my G10 with me everywhere I go these days, just in case I stumble upon a scene like this!
")
Original Image Before Post-Capture Processing
Depth of Field and Image Clutter
One of the drawbacks to using a point & shoot style camera like the G10 for this type of action shot is the very wide depth of field. Yes, the same feature that makes a point & shoot cameras so great for landscape works makes them fairly poor for portrait work. The problem is image clutter. When almost everything in the frame is in perfect focus your main subject tends to become lost in the clutter. That’s why most portrait photographers shoot with very large apertures to attain that perfect blurred background or bokeh.
Luckily, there is a great little Photoshop plug-in from Alien Skin called “Bokeh 2” that helps eliminate this background “clutter” during post-capture processing. It works nearly as well on images from my G10 as it does on those from my 5D2.
My first step in creating this image was to process it as I would normally do in Lightroom. I generally work on the Basic settings like Exposure, Recovery (very important), Blacks (also very important), Brightness and overall Contrast. I almost always crank up the Clarity (adding mid-tone contrast) and Vibrance (adding mid-tone saturation) and may play with these two settings for 20 or 30 minutes until I find a combination I like.
At this point, my work in Lightroom 3 is complete and my next step is to export the image into Photoshop CS5 and use the Quick Selection tool to select the shooter and timer as shown here. Although the selection doesn’t have to be pixel perfect, it always pays in realism to spend a little extra time making a thorough selection of all parts of the subject.

Quick Selections in for Photoshop CS5
Once you’ve got a basic selection done it’s time to use the Refine Edge tool to Smooth, Feather and Expand the selection you’ve just made. For the most realistic look I want to make sure all the subjects that should be in perfect focus are included in the selection and that the selection “feathers” into the background naturally. Once that’s done your new selection should look something like this.

Refine Selections in for Photoshop CS5
You’ll understand why this step is vital when you begin to play around with the settings in the Alien Skin Bokeh plug-in filter. Bokeh provides creative controls to enhance images by focusing the viewer’s attention anywhere you want. In the image above, the Bokeh plug-in was used to enhance the background blur. Blurring the background in an image like this one makes the subject “pop” and seem that much sharper.

Alien Skin Bokeh 2 Plug-in for Photoshop CS5
The final step in Photoshop CS5 is to blend the two layers you’ve just created using Lightroom (background layer) and Alien Skin Bokeh (bokeh layer). Now you could do this simply by flattening the layers but I suggest you take a little time and experiment with the Opacity of each layer until you achieve the desired results. I tend to blend the Bokeh layer at 65% – 75% to achieve the most realistic look to my image. Once you’ve completed this process, you just save the image in Photoshop and it should automatically show up in Lightroom, ready to be exported or printed, just like these three images below.
")
That’s Some Rifle Ma’am – Magnolia, Texas
Copyright © 2011 Jeff Lynch Photography
Shot taken with a Canon Powershot G10 set on aperture priority (Av) using a circular polarizer. The exposure was taken at 32mm, f/4.5 for 1/60th of a second at ISO 80. All post capture processing was done in Adobe’s Lightroom 3 and Photoshop CS5 using Alien Skin’s Bokeh plug-in.

Old Time Shooting – Magnolia, Texas
Copyright © 2011 Jeff Lynch Photography
Shot taken with a Canon Powershot G10 set on aperture priority (Av) using a circular polarizer. The exposure was taken at 32mm, f/4.5 for 1/60th of a second at ISO 80. All post capture processing was done in Adobe’s Lightroom 3 and Photoshop CS5 using Alien Skin’s Bokeh plug-in.

Girls & Guns – Magnolia, Texas
Copyright © 2011 Jeff Lynch Photography
Shot taken with a Canon Powershot G10 set on aperture priority (Av) using a circular polarizer. The exposure was taken at 32mm, f/4.5 for 1/60th of a second at ISO 80. All post capture processing was done in Adobe’s Lightroom 3.
Checkout my new Cowboy Action Shooting blog for more images just like these!


 There is a very special location in


")

